Save Time: Get 5 Simple Writing Tips
you can put to use in 10 minutes
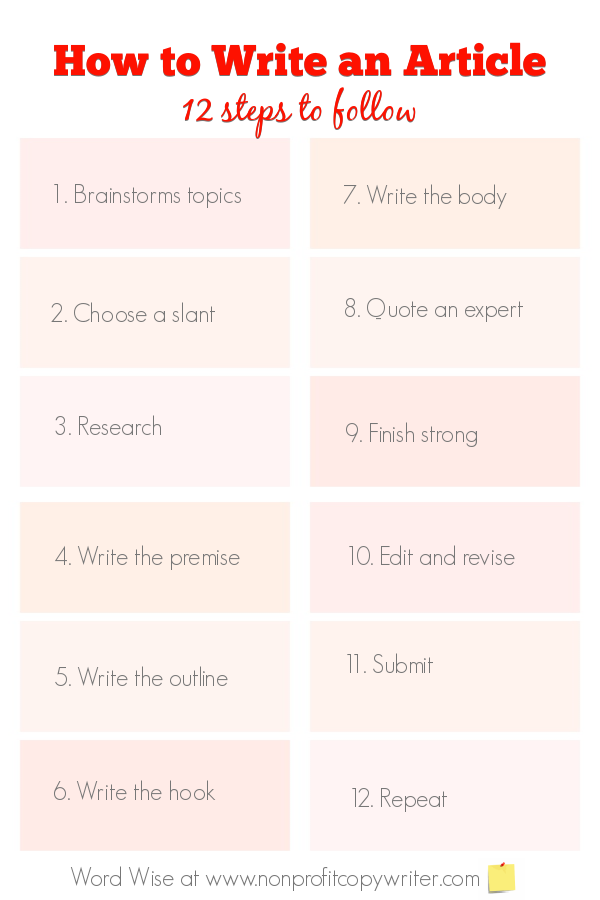
How to Write An Article: Get Started With These 12 Steps
Award-winning writer Kathy Widenhouse has helped hundreds of nonprofits and writers produce successful content , with 750K+ views for her writing tutorials. She is the author of 9 books. See more of Kathy’s content here.
Updated 10.2.25
My first “official” writing course taught me how to write an article and break into print. Back then, the internet was still fairly new. Magazines were one of the main avenues to accumulating clips and experience. Many a freelance writer got their start by writing feature articles for trade and consumer publications – myself included.
Plus, learning how to write an article yielded more than bylines. I’ve been able to apply those skills as I write other kinds of content. Some project-specific details vary, but the principles are the same.
For instance, when I learned how to write an article, I learned the basics for writing a blog post. I learned how to gather facts, anecdotes, quotes, and stories to write a research paper or an essay. I even learned in large part, how to write a book.
This set of 12 tips outlines how to write an article. Complete each step, one at a time, and you’ll acquire those skills. Plus, you’ll have completed an article that you can submit to a magazine or blog or publish on LinkedIn, Medium, or another article sharing platform.
How to Write an Article: Take These 12 Steps
Step 1: Brainstorm topics
Start writing your article with a fun brainstorming session to gather a pool of ideas in a short amount of time. If you have zero ideas of what to write about, then brainstorm a list of topics that are interesting to you. If you have a topic in mind for your article, then brainstorm a list of different subjects associated with that topic.
For example, let’s say you need to brainstorm a general list of topics that interest you and you come up with …
- The U.S. Civil War
- Tennis
- Baroque music
- Weather
Or let’s say you’re interested in the weather and you need to brainstorm a list of subjects associated with that topic. Your list might look like …
- Hurricanes
- Weather maps
- Amateur meteorology
- Planning events around the weather
Step 2: Choose a topic slant
An article topic is broad, but a slant is specific. How will you slant your article topic to a publication’s readers? Do your homework and determine the approach that’s a good fit for your article.
If you’re writing an article about the weather for a bride’s magazine, then slant to outdoor wedding plans for inclement weather. If you’re writing a column for a regional newspaper, then your slant can be how to prepare for the upcoming hurricane season. Maybe the publication is for entrepreneurial leaders … preteen boys … firefighters … NASCAR enthusiasts. Know the publication’s audience and slant your topic to that readership.
Observe the kinds of articles does the magazine or website publishes – feature articles, how to’s, opinion pieces – as well as the writing style. Is the content conversational or academic? Is it straightforward, serious, humorous, instructional, or reflective? Read the writer’s guidelines so you understand the publication’s content, style, and word count requirements.
Step 3: Research
An article is a source of information. (Blog posts, editorials, essays, and copywriting, on the other hand, use facts but also inject opinion.) In order to write helpful, credible, well-constructed articles, you need source material.
Research your topic and gather facts, statistics, anecdotal evidence, quotes. Go to reference works, periodicals, news sources, books, recorded interviews, government publications, nonprofit publications, case studies to gather background. Gather two times as much information as you need for your article.
What should you do with all the extra? You’ll tag it with keywords and keep it in your files to use for another writing project at another time.
Step 4: Write a premise
Once you’ve collected information about your topic and processed it, you’ll have determined a main point you’d like to make to a specific set of readers. Write that point as a premise or thesis statement – a sentence summarizes your main idea and presents your position. It’s the core tool I use in persuasive writing, including articles, letters, web pages, landing pages, social media posts, case statements, books, grant applications … literally any piece of persuasive content.
(If you struggle to drill down to your key point, use this handy tool that helps me find my article main idea every time.)
Then you can keep your thesis statement in front of you as your write to allow you to stay on message.
Step 5: Write the outline
Now it’s time to organize your material in a logical order.
Review your list of ideas and look for patterns. Sometimes the outline format is evident right away. If not, ask yourself two questions:
- If I wasn’t familiar with this topic or if the topic was confusing to me, how would I want it explained?
- What would I need to know first?
An outline is simply a plan. It’s a plan you follow as you write so that you make your point. Yours can be a detailed, beautifully formatted document with multiple points, sub-points, and sub-points to sub-points. Or it can be 3 words scribbled on the back of a napkin. Style matters less than simply having a plan.
Tip 6: Write the hook
Call it the introduction, the hook, the lede, or the lead – in any case, its purpose is to grab your reader’s attention and entice her to keep reading. (Try to avoid forgettable first lines that are so common.) Leads boil down to two main types.
- A summary lead presents your main point – or your most important information – in a concise sentence or two. It’s clear and succinct. Use it when you want to simply present facts or get to the point right away,
- A creative lead can be a provocative quote, a funny anecdote, an intriguing fact, a common misconception, a problem or mystery to be solved, an inspiring promise, a surprising statistic, a comparison, contrast, or conflict, a zinger or punch statement – these creative leads operate as legit “hooks” to draw in the reader. It’s the surprise or twist that makes a creative lead so successful.
Step 7: Write the body
You’ve done a good job researching your topic and writing your outline. Now that you’ve hooked your reader, work your way through each section of your outline. Make each point and support it with a fact, statistic, quote, an anecdote or example. Use transitional phrases to move logically from one idea to the next, either starting with your strongest argument to the weakest … working chronologically … following a step-by-step order … or building your case sequentially.
What should you do with the extra content that you cannot use in the main body of the article? Where possible, include a sidebar – a short “article within an article” – that adds value to your content. Your “5 Day Trips to U.S. Civil War sites near Baltimore,” for instance, can include a sidebar that lists addresses and hours for the five sites in your article.
Step 8: Quote at least one expert
Quoting from a knowledgeable source is standard operating procedure when writing an article (which is written to inform) – much more so than when writing a blog (which is written to share a viewpoint.)
A carefully-chosen quote instills authority. Choose a respected or credentialed source for your quote. And choose the shortest quote possible – one that is memorable, such as a pithy statement, vivid example, or colorful turn of phrase. Your purpose in quoting an expert is not to repeat their work but support your point or argument.
Step 9: Finish strong (and short)
The weakest articles end with a rehash of the article. The strongest are not only short – comprising 10% or less of the total word count – but add a twist or surprise that supports your main idea. Give yourself a bonus point if you can tie your ending to the story, fact, or piece of information you used in your opening hook.
Step 10: Edit and revise
Entire books and courses are taught about editing, but there are two areas you can self-monitor quite easily. Some writers call these the “Two Pillars of Editing.”
- First, edit your article content. Do you have a clear premise? Do you have support for each of your points?
- Second, edit your language. Read your article aloud. Ask yourself, “Does this post read like I talk?” Catch errors or awkward phrasing. Eliminate complicated words.
Review your article until it is as clear and accurate as you can make it. Then you’re ready to …
Step 11: Submit your article
Thousands of print and online publications publish weekly or even daily editions. They are looking for freelance writers to fill their pages. Among these publications are hundreds of niches from fashion dolls to potato farming. Start with one or two markets that interest you.
Make a list of publications that serve that market. Perhaps you already subscribe to a few of them. You’ve read the content and you’d like to write for them.
If you submit your article for publication in a print or online magazine, be sure to offer first rights – that is, the right for that publication to be the first to print your masterpiece. This way, after publication you can offer reprint rights to other publications and get your article before more eyeballs.
Or if you published your article on your blog or website, then publish it again on an article sharing platform like Medium to get additional exposure.
Step 12: Repeat
Go back to Step #1 and start the process again – with another article. Your stable of clips will grow. And so will your bank account.
More Writing Tips for Articles
Learn To Write Content When You Learn To Write an Article ...
How to Narrow Your Article Main Idea ...
How to Write an Article Introduction Faster ...
How to Develop a Story Idea ,,,
What Is a Feature Article? Think News Story on Steroids ...
How to Choose an Article Topic...
The 2 Best Ways to Narrow Your Topic for an Article...
Want Steady Traffic? Write 3 Different Types of Articles that Deliver ...
6 Types of Articles New Freelancers Can Get Paid to Write ...
Choose a Story Angle Using These 3 Tips ...
12 Tips for Successful Interviewing ...
Top Article Writing Tip: the One-Point Rule ...
How to find the main idea of your article before you write ...
8 Types of Leads that Pull in Readers ...
How to Write an Outline: Article Writing Tips ...
Tips for Writing a Hook for Your Article ...
How to write a conclusion: 3 tips ...
Writing Articles Tips on our Pinterest board ...
Return from How To Write an Article to Nonprofit Copywriter home
As an Amazon Associate I earn from qualifying purchases.
Share This Page

Named to 2022 Writer's Digest list
BEST GENRE/NICHE WRITING WEBSITE

Stop Wasting Time!
Grab your exclusive FREE guide, "5 Simple Writing Tips You Can Put to Use in 10 Minutes or Less"
